Assigning Object Properties
Properties are named attributes of a form or control. They define an object's characteristics, such as size, color, and screen location, and aspects of the object's behavior, such as whether it is enabled or not. You may set properties in the Properties window at design time and in code at execution time.
Setting Property Values using the Property Window:
1. Select the form or controls desired.
2. If the Properties Window is not visible, choose Properties from the Window menu or simply press the F4 key.
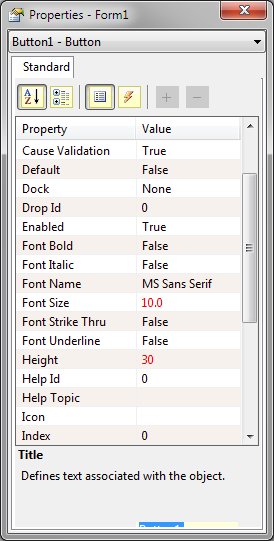
3. From the Properties window, select the property you want by clicking the property name in the Property column. The Form Designer displays the current setting for the property in the Value column.
4. In the value column, enter the property value desired:
For a property that requires entering text or a number, type the information.
For a property that request a number, you may type the number of use the up and down scrollbox.
For a property that has enumerated or Boolean values, click the down arrow to the right of the value box and select the option you want from the combo box. You may also double-click the property name to cycle through the list of available choices.
For some properties a dialog button will appear in the value column. The dialog button is identified by having a label of three dots. Click this button to display a dialog box allowing you to select the settings for the property.
Repeat steps 3 and 4 for each property you want to set for the selected form or control.
Property Display Format
The Designer supports two styles of property display. The first two buttons in the Property Window Toolbar control the display format.
The default style of display is an alphabetized list of properties. Properties are shown sorted by name in an ascending order. The Name Property is always show at the top of the list. This style is best used when the property name desired is known.
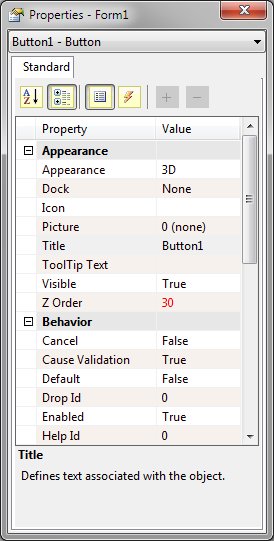
A categorized style of display is also available. In this style, properties of a particular category (i.e., behavior, appearance, font, etc.) are grouped together. This style is best used when the property name is now known.
Property Window Display Modes
Multiple Selected Controls
When multiple controls are selected, the Property Window will show "(multiple selection") as the control name at the top of the window. The user has the option of seeing all properties that the selected objects have in common or all properties for all selected objects. The Plus (+) and Minus (-) buttons in the Property Window Toolbar control this display mode.
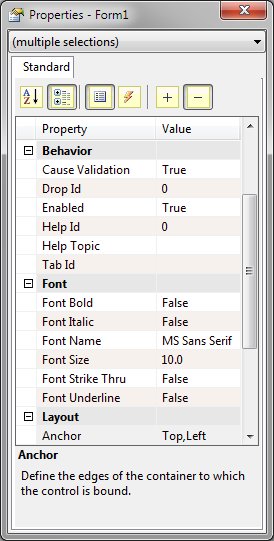
Multiple objects selected
Setting Property Values in Code
To set form or control properties at run time, use the SETPROP or SETITEM instruction.
Example:
The Designer supports an internal built in macro named &OBJNAME. This macro is transparent to the compiler and only applies to code in the Designer. The macro allows use of generic routines or statements in any number of object procedures without code modification.
Example:
This line will work equally well with an EDITTEXT object named 'txtCustomer' or a radio button named 'rdoOption'. When the form is saved, the Designer expands this macro to the name of the object to which this code is attached.


 |